Showing posts with label art. Show all posts

Tuesday, 7 September 2010

Our Art Corner in the Kitchen

We have decorated the kitchen this week and I have also rearranged the art corner, with the introduction of the boys small table in to the kitchen are and the addition of some great storage from Ikea for the pens etc.


We have painted the kitchen Willow (a soft soothing green) after MadDad decided that the green I had chosen was too green!


The table is from Ikea and I painted the top with blue chalk board paint ages ago and the boys love to use chalk on it.  


It works really well, as it means the boys can come in to the kitchen and do art or puzzles etc whilst I cook dinner and it is also a great area for showing off their artwork.  It is my favourite place in the whole house.  The whole art corner upgrade was inspired by The Happy Home.

How do you display your children's artwork?


Share/Save/Bookmark

Wednesday, 4 August 2010

Three for the price of One - The Gallery, Play Academy and Children's Craft Showcase


The Gallery this week is extra speical as it is linked with Cathy my friend over at Nuturestore and her Play Accadamy, so I thought that I would use a new Childrens Craft Showcase for this week, as it really seemed to fit the bill.

I think that this craft is pretty self explanatory, we all have bubble wrap and using it to pain on and create texture is so much fun for children.


We used our bubble wrap to make a sea on cards and on some paper.  We painted the wrap blue and green.


Then pressed it down on the card and paper.


To make a funky pattern.


We used foam shapes on the cards.


I cut out images of fish on paper and the boys painted them.


To make fish on the cards, we used the circle stickers and cut out a triangle to make the mouth and stuck it on as a tail, inspired by The Frugal Family Fun Blog.

We used tissue paper as sea weed.


This is our final art work which is gracing the wall in the dinning room.  It even has a treasure chest!

So if you have any crafty posts of things you have been doing with your children over the last few weeks then please link up below.  I would love to see what you have  been busy making and doing.


 0 entries so far... you're next!

      You are next... Click here to enter


    Share/Save/Bookmark

    Monday, 12 July 2010

    Children's Craft Showcase - How to make paper flowers


    This is a really simple way to make flowers for someone special, not for any reason, just to say I love you.  They would also make a really great gift to say thank you to any teacher at this time of the year.


    Materials

    Tissue Paper
    Heart Punch or template and scissors
    Paper Straws (Art straws - 99p from The Works)
    Paper brads


    Method

    This is such a simple piece of craft, that Maxi actually made all of our flowers (roses) which we took with us to see The Wiggles and give to Dorothy.

    Use the punch to make heart shapes out of tissue paper

    With a single hole punch make a hole in each at the point end


    Place you tissue paper petals on to the paper brad


    Place you brad in to the end of your paper straw.


    Keep going until you have a bunch of beautiful paper roses (we gave ours to Dorothy the Dinosaur, when the boys saw The Wiggles)


    Share/Save/Bookmark

    Tuesday, 25 May 2010

    Children's Craft Showcase - Fathers Day Cards and Presents

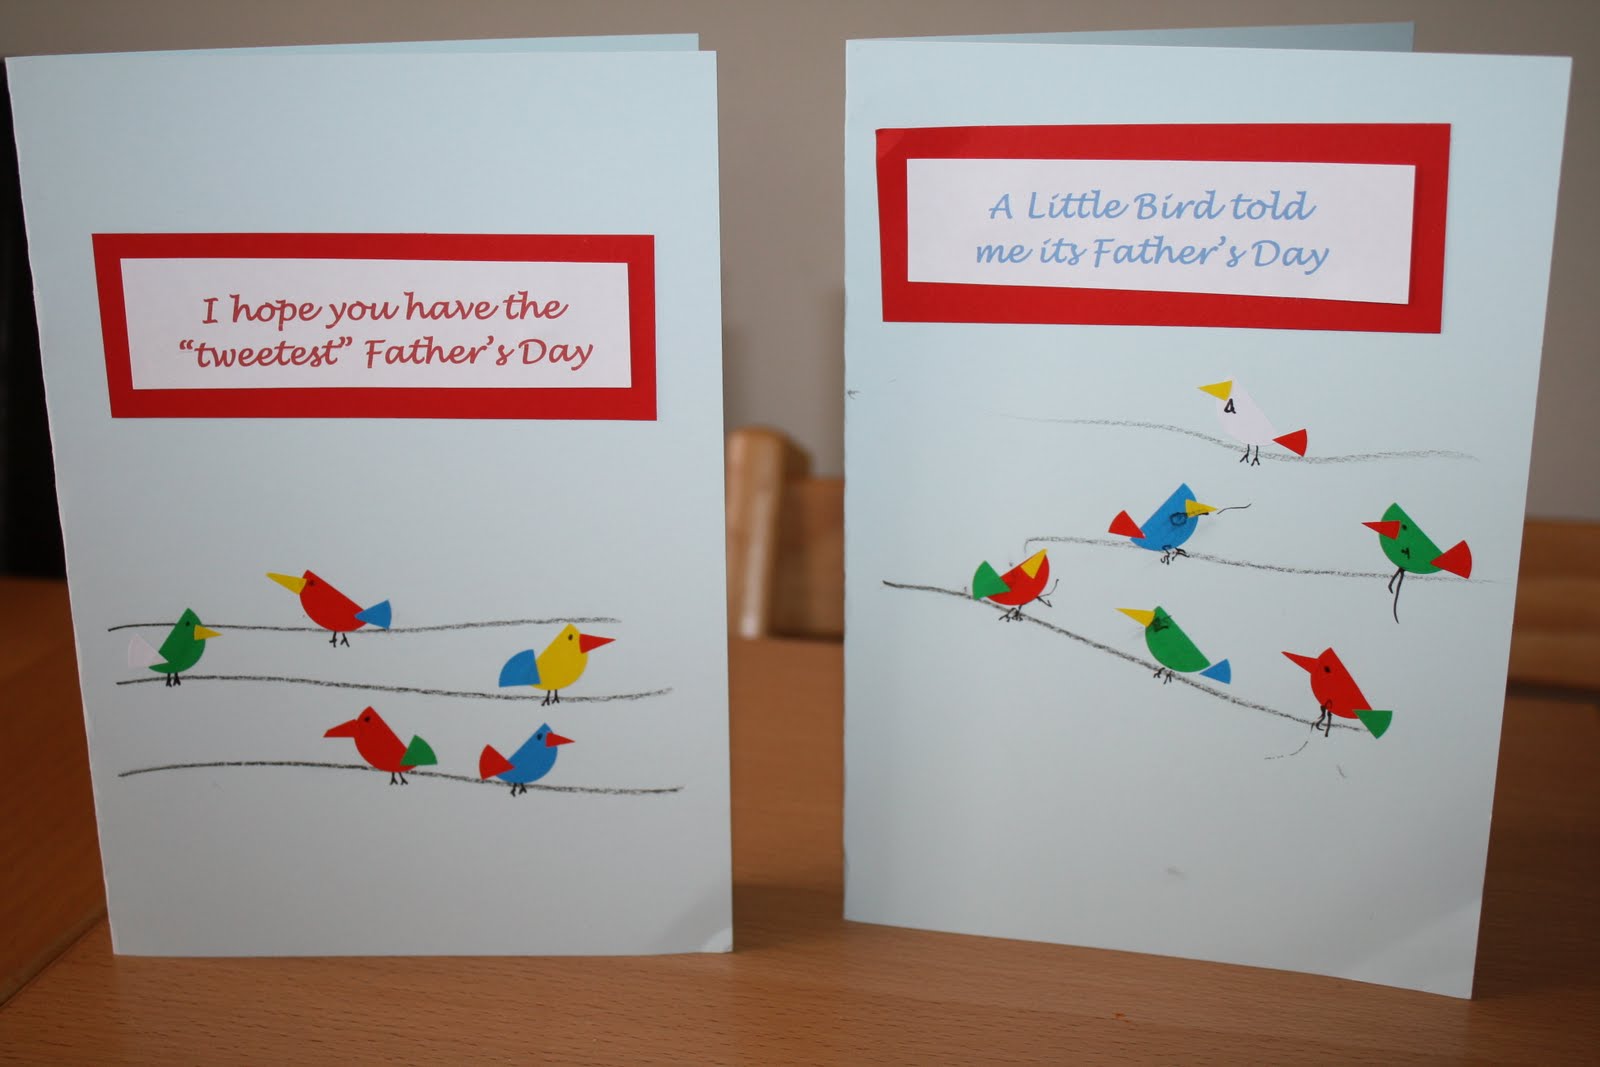
    Fathers day will soon be upon us, it is Sunday 20th June this year and I have been busy thinking about cards and gifts for MadDad.  If you are anything like me then you would prefer to give a home made card every time.

    I have a couple of very simple ideas for you.


    I was inspired by Valerie at Frugal Family Fun Blog for this card.

    Materials

    Card stock
    pencil or pen
    circle stickers, various colours
    scissors

    Method

    Initially fold your card stock in half to to create a greeting card shape

    Draw a number of lines horizontally across the card to make the wire for the birds to sit on.

    Depending on the age of your child, you can either cut the stickers for them or help them.

    You use half a sticker (semi-circle) for the birds body, a sixth of the sticker to make the tail feathers and an eight of the circle to make the birds beak.

    Using either a pencil or a fine liner add some feet and eyes for the birds

    It is really easy, simple, very effective and then all that is left is to add your cheesy bird quotes

    Next up is a twist on our favourite chick cards, we have done this for my niece who is 5 this week.


    Materials

    Card stock
    Paper
    Scissors
    feathers
    Googlie eyes
    Glue

    Method

    Again very simple, Mini cut out two bird shapes (semi circle) and stuck them to the folded card stock.


    We used two triangles cut out of foam for their beaks and a feather for the tails.  He also used foam shapes to add an age and name on to the card.

    Scrap Art Book Marks

    This is a super way of using up and making purposeful bits of art that the children have done.  For ours I used our Mable Paintings.


    Materials

    Card
    Scissors or paper cutter
    Scrap Artwork
    Paper
    Glue
    Laminator or clear sticky backed plastic (also know as contact paper)


    Method


    Cut and matt the scrap artwork and your choice or card, making sure that the artwork is slightly smaller than the card backing and glue on.


    We made a back for the bookmark out of paper, which read Happy Father's Day 2009 and then mini decorated it and stuck it on to the rear of the bookmark.


    I then laminated them, I got four in to one pouch leaving space for the sheet to adhere between the bookmarks.  If you don't have a laminator (mine was £5 from Tesco), then you can use clear sticky backed plastic or contact paper.


    I then used my guillotine to cut them up to individual double sided book marks.
    -------------------------------------------

    I hope I have inspired you to get crafting for Father's day this year  and if you do, I would love for you to come back and link here, so that we can all see and maybe have a try of your ideas too.

     0 entries so far... you're next!

      1. You are next...
        Click here to enter


      Share/Save/Bookmark

      Monday, 12 April 2010

      More Spring Cards and Crafts for Children


      The boys have been busy making again, the above one is made by stamping with half a potato and mini made this all by him.


      This one is Maxi's, his writing is getting to be excellant and he did the spelling all by himself.


      Maxi did the cutting out on this one and it has become a classic in this house!


      This is Maxi's Easter Bunny Basket.


      This was maxi's Easter Bunny Egg, which he made all by himself at school.  He didnt win the competation, but them some of the eggs were pretty perfect a nd I am sure the parents had more of a hand in them than I did!


      Share/Save/Bookmark

      Saturday, 24 October 2009

      Wet weather Halloween decorations

      Well today has been very wet, so I decided to do some very easy Halloween decorations with the boys that required minimal preparation or involvement on my part.


      So we made paper pumpkins and drew faces on orange balloons. 

      Whilst MaxiMad was a football practice I did was cut the paper for the pumpkins and black triangles for the mini's to decorate them with.  I also blew up a couple of orange balloon's (I need to get some more as they really enjoyed this part)


      All the mini's did was colour in the paper with orange crayons and then stuck the black card where they wanted it to decorate them.  I then hung the pumpkins on garden twine and popped them up

      One tip - make sure you use permanent markers on the balloons, otherwise you will end up covered in felt tip.  I keep a set out of the reach of the boys for times like this.


      Wednesday, 21 October 2009

      Picture Perfect Meme

      Linda at 'You've got your hands full' tagged me with the Picture Perfect Meme, which Tara at Sticky Fingers started.

      You have to show a picture that your children have drawn about you.

      You may remember that a little while ago MaxiMad made a trip to the local sorting office where he saw the life cycle of a postcard he had previously posted.  Well on that postcard was a picture of his family.


      A while back MadDad ordered me the the wonderful Handmade home by Amanda Blake Soule, who is Soulemamma.  In it she makes Portrait Bookmarks (she has a free PDF with the instructions on here). 

      I thought these were a great idea for the Grandparents at Christmas, but thought I would give it a try with the above drawing first.  Now I haven't embroidered since school, although I have been know to do a couple of cross stitches, so it is by no means perfect, but I love the finished product.


      I have backed it with some denim from an old worn through pair of jeans and used ribbon from my stash.  I already had the tea towel I have embroidered on to and the thread from an old cross stitch, so this has cost nothing.

      I was so proud of MaxiMads drawing and this is a fitting way of recording it and one I will get to look at all the time.  I have already started on the rest of the family and everyone should get one for Christmas.


      Tuesday, 13 October 2009

      Autumn Art with PlayMais


      MaxiMad and Mad dad have loved exploring the playmais and decided to do some autumn cards with them to test out their ability to stick to paper and card.


      MaxiMad decided on an autumn tree


      and a bonfire


      He used chalk to colour in the sky and added a moon and stars


      Aren't they just fantastic..... Yes the cards are too (dont you just love the little hedgehogs under the tree).

      Monday, 28 September 2009

      Easy Homemade Cards

      We have lots of birthdays to celebrate in September and we are big fans of homemade cards.  Now that MaxiMad is at school, time to make elaborate and complicated cards are a thing of the past.  We needed a quick, all inclusive idea.

      So we made ........................


      Chicken cards, which are ever so easy and very effective.

      All you do is take a piece of card and trace round a plate, cut it out with pinking scissors, add a few feathers, a foam beak and a googly eye.

      The only part I do is the cutting, MaxiMad does the tracing and both the boys love gluing and sicking. 

      It makes for a home made with love and inexpensive card.

      Anyone with anyother ideas for basic cards that can be done, easily and by littleones, please let me know.

      Related Posts with Thumbnails